Floorplans are important for the virtual tour when it can navigate visitors easier like following the map:

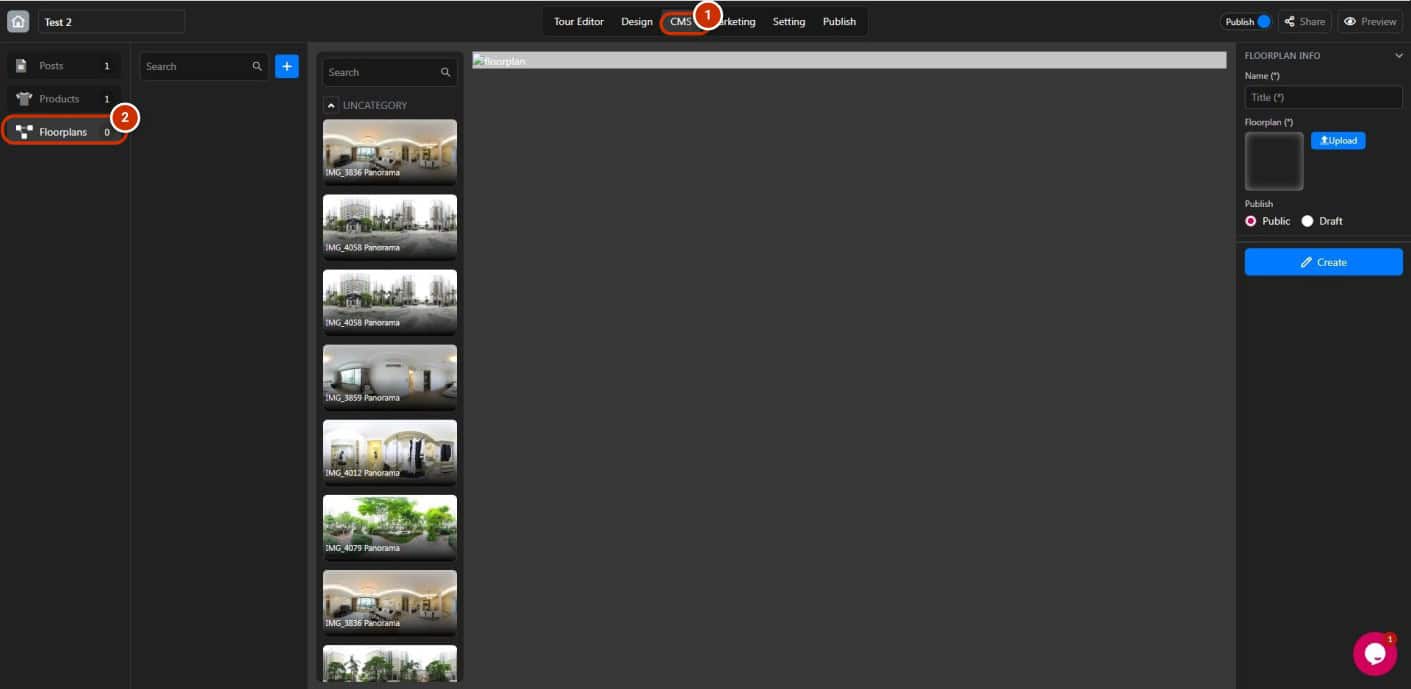
1. Open the project and switch to the “CMS” tab.
2. Open the “Floorplans” section.

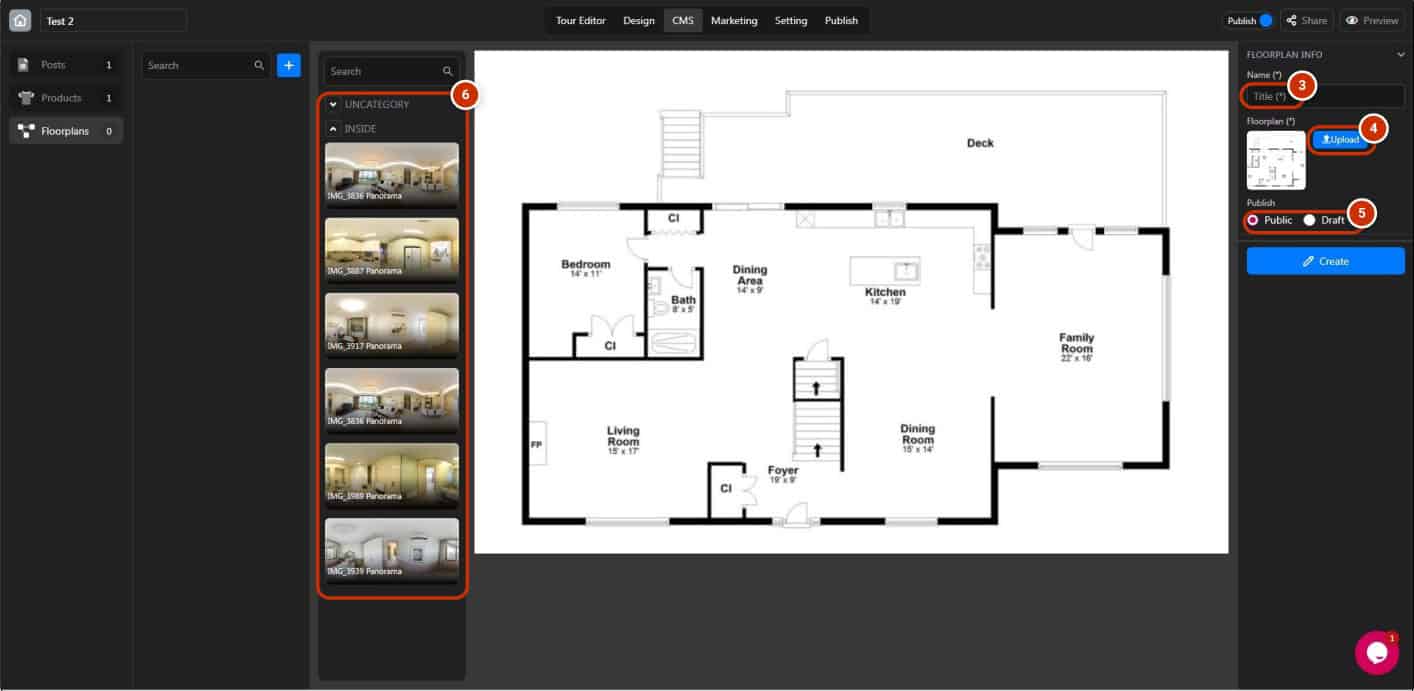
3. Set the name of the floorplan.
4. Upload the floorplan.
5. Set the floorplan as a draft or publish it.
6. Manage your scenes better by using the “Group” feature

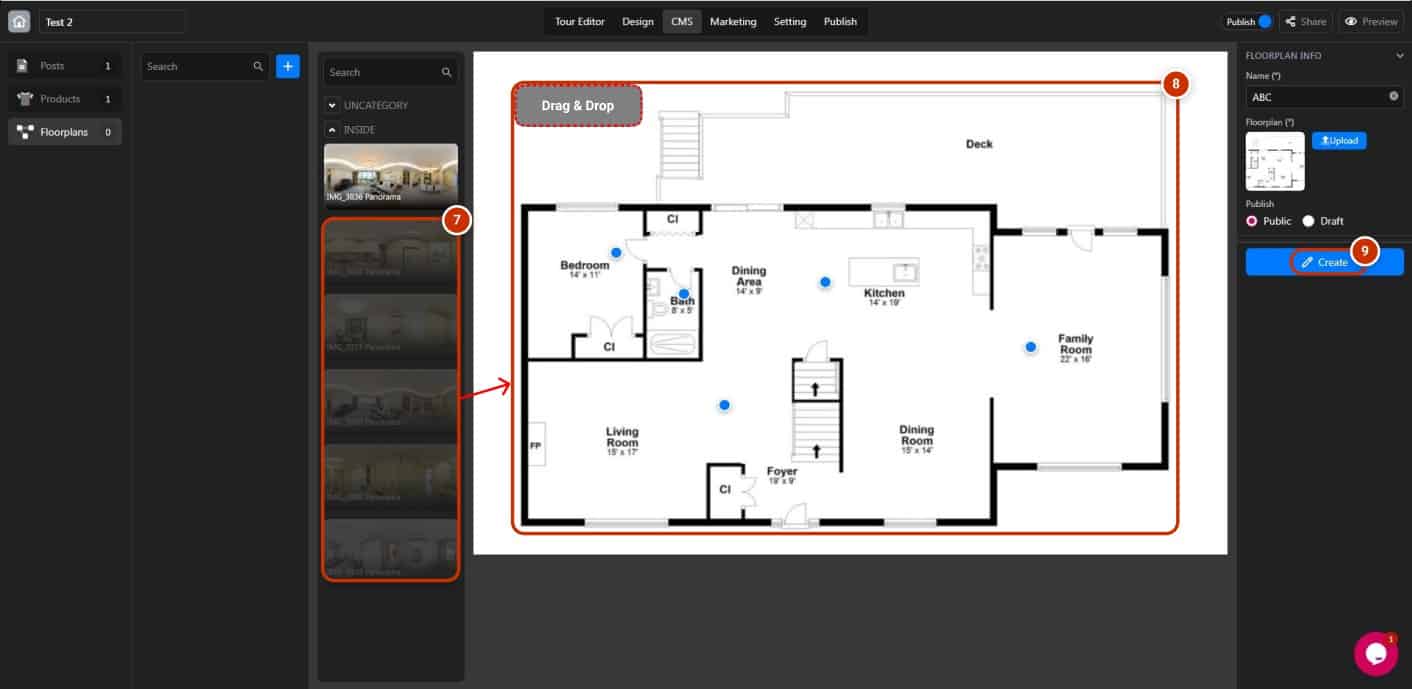
7. Drag and drop scenes to the floorplan at the right spot
8. IMPORTANT: Please drag and drop to the right spot, and do not move the point to another spot. If you drop it to the wrong spot, remove it and drag & drop it again. After dragging and dropping, these scenes must have a fade-black color to be valid.
9. Click “Create” to add the floorplan to the project.
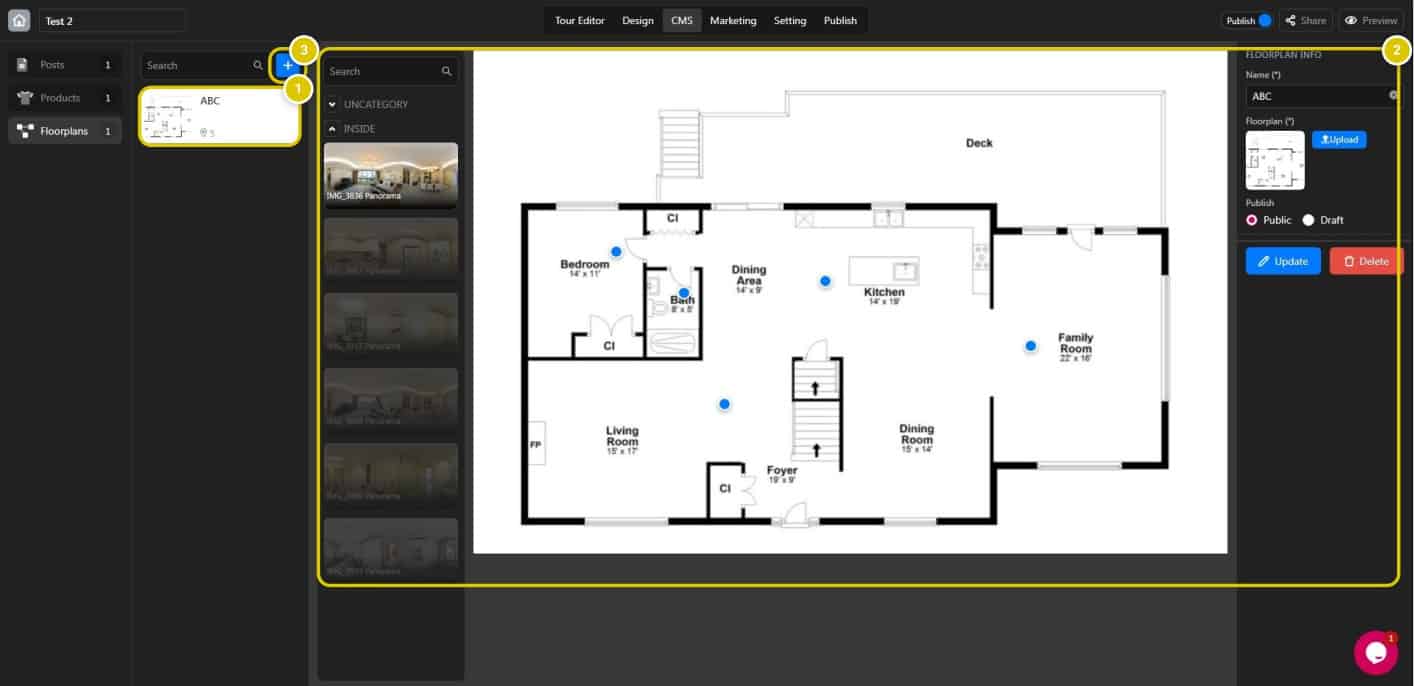
Edit the floorplan or add more floorplans

1. Choose any created floorplans on the list that you want to edit.
2. Edit or delete the floorplan.
3. Add more floorplans to the list.