Step 1: Create a virtual tour

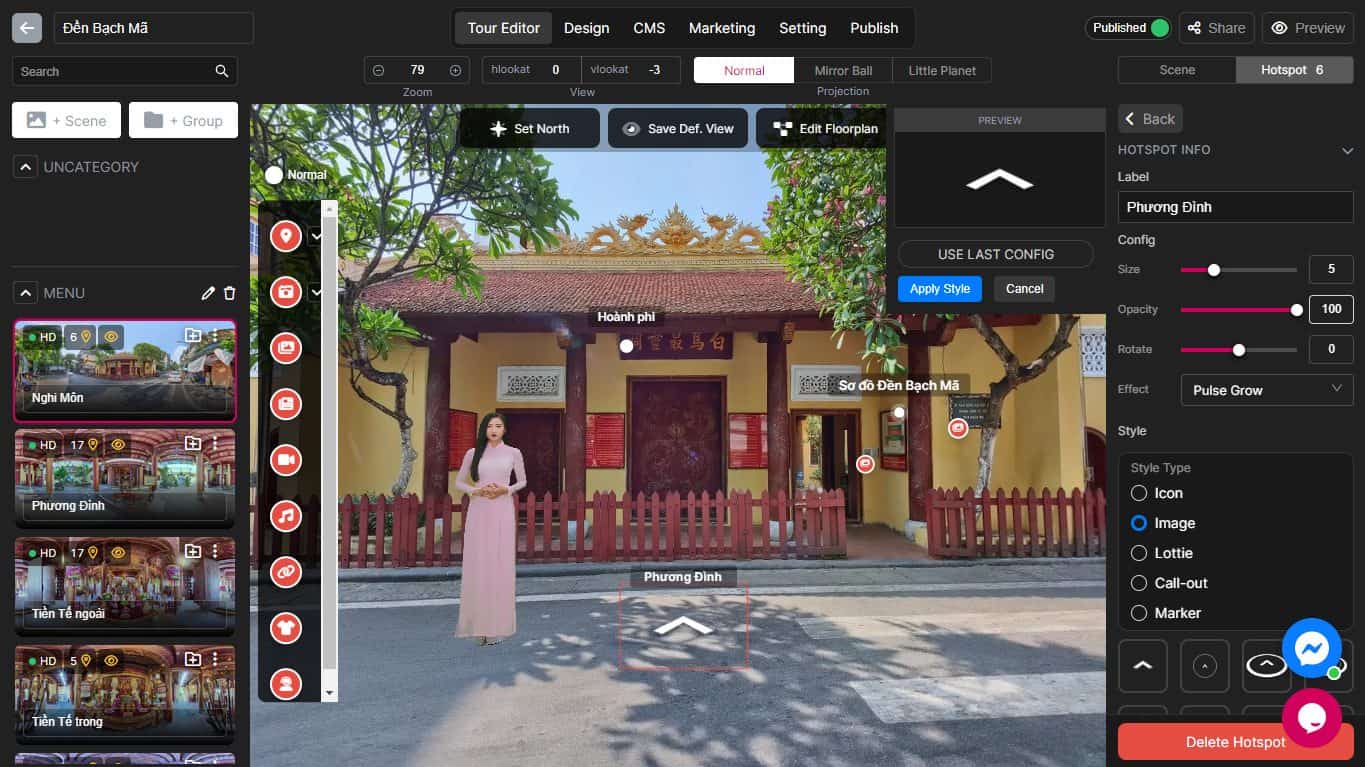
The first step is to create a virtual tour using Panoee’s Studio page. You can upload your own 360° images. You can then edit your panoramas, add hotspots, choose a theme, and customize your virtual tour as you like.
Here are some few tips to enhance your virtual tour stand out competitors:
Step 2: Double-check the virtual tour the last time

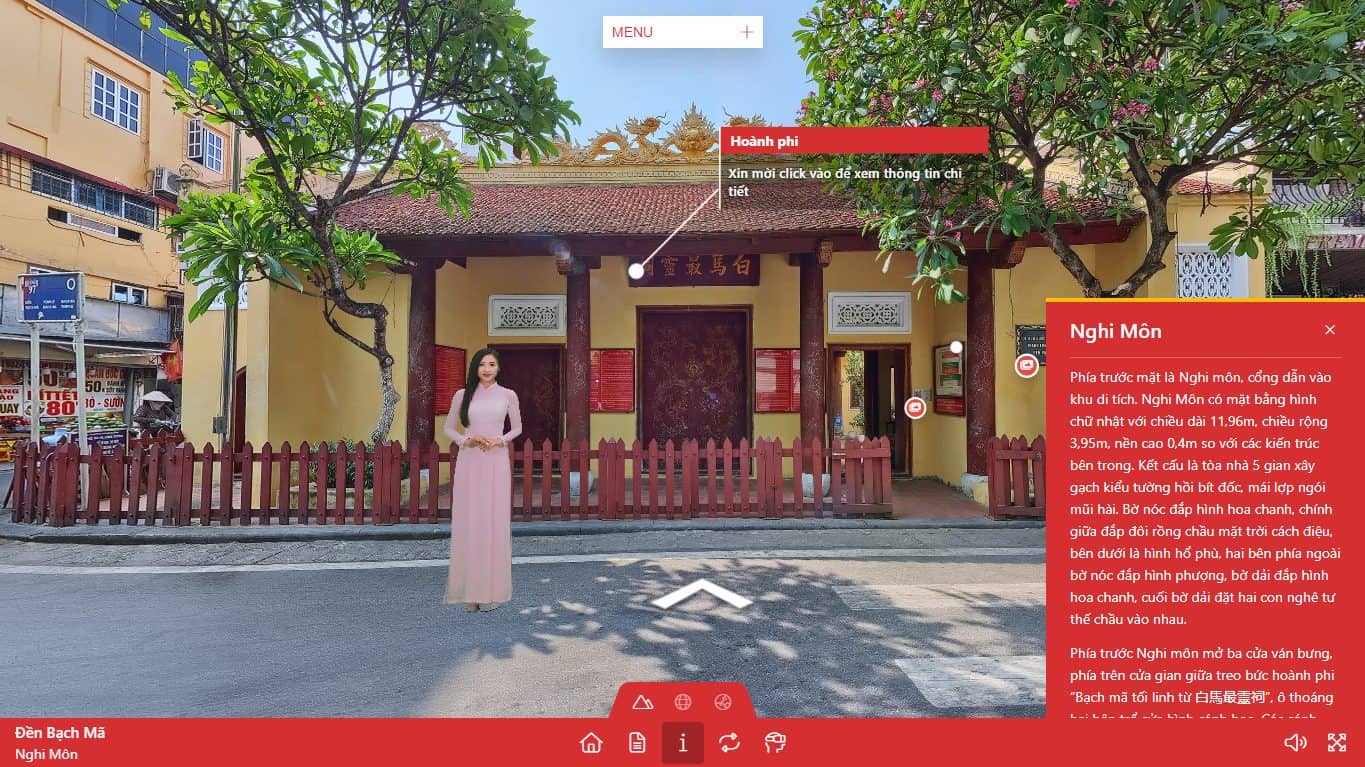
Step two is previewing your virtual tour and verifying all works as expected and looks good. Panoee offers its Preview mode to preview how your tour will appear across devices and browsers before exporting, plus sharing it with others and collecting feedback through Panoee’s Share feature. Another reason you must double-check the virtual tour is it can’t be edited when you export successfully.
Step 3: Access the Publish tab

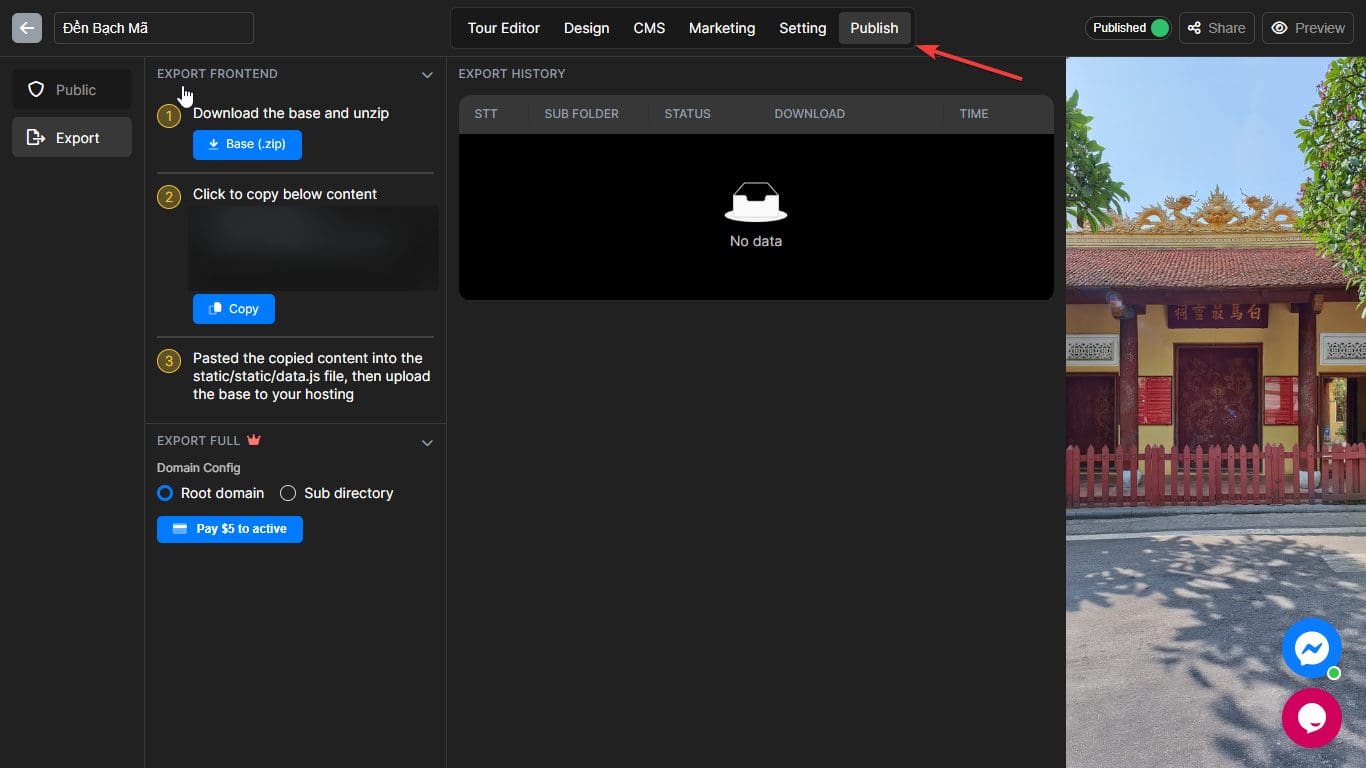
Once completed, accessing the Publish Tab on the Studio page’s top right corner will enable you to export your tour.
Step 4: Choose the type of Export

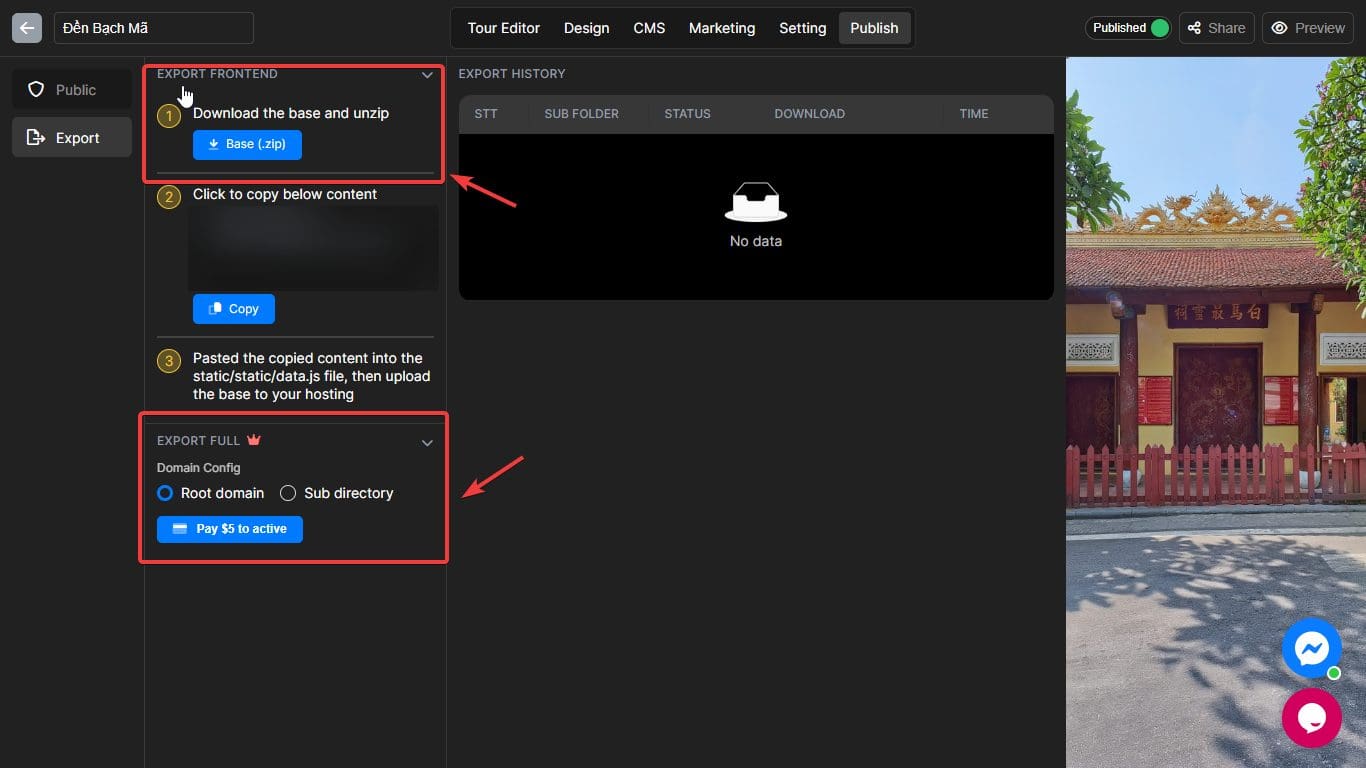
The fourth step is selecting the type of Export that best meets your needs. There are two types: Front-end Export and Full Export.
Front-End Export is a free option that will download your virtual tour as a ZIP file with all its default settings and quality settings but only includes front-end files like HTML, CSS, JS and XML – meaning it still relies on Panoee’s server to load images and resources for loading your virtual tour.
Full Export is an optional paid feature that lets you download your virtual tour in a ZIP file with all its settings and quality options, including images and resources that make up its virtual tour. By taking this route, your virtual tour can become independent from Panoee’s servers, running faster and smoother overall.
Full Export has two sub-options for the Root domain and Sub-directory exporting.
The Root domain will let you host your virtual tour on your website, such as www.yourwebsite.com.
Subdirectory hosting allows you to host your virtual tour on an independent subdomain of your own website – for instance, www.yourwebsite.com/yourname
The full Export costs $10 per Export with unlimited bandwidth and storage capabilities.
Step 5: Export
Once complete, Panoee generates and downloads your ZIP file depending on its size and quality – this may take one to two business days, depending on its complexity.
Step 6: Download the Export file
The final step involves downloading your virtual tour ZIP file. You should find this in your Downloads folder or wherever your browser configures to save downloaded files.