Why This Camera & Lens Are Great for Panoramas
If you want a fast, reliable way to capture full 360° scenes with minimal shots, the Canon EOS 5D Mark IV paired with the Peleng 8mm f/3.5 fisheye is a proven workhorse combo. The 5D Mark IV’s 30.4MP full-frame sensor (36×24 mm) delivers clean files with a wide dynamic range (roughly 13 stops at base ISO), solid color depth, and excellent highlight recovery—great for HDR panoramas and difficult lighting. Its pixel pitch of about 5.36 µm and robust low-ISO performance mean you can comfortably shoot at ISO 100–400 for maximum quality, and push to ISO 800–1600 for night scenes while maintaining control over noise in post.
The Peleng 8mm f/3.5 is a circular fisheye on full frame with a 180° field of view. That extreme coverage lets you complete a spherical 360×180 panorama with as few as three shots around plus zenith and nadir frames. Fewer images minimize parallax issues and speed up your workflow, especially in changing light or crowded environments. The trade‑off is fisheye distortion and some edge softness/CA, which you’ll compensate for by shooting at f/8 and using a calibrated panoramic head. On the Canon EF mount, the Peleng’s fully manual controls (aperture and focus) are actually an advantage for consistent exposures and focus across the set.

Quick Setup Overview
- Camera: Canon EOS 5D Mark IV — Full Frame, 30.4MP sensor (6720×4480), ~13 stops DR at ISO 100, comfortable ISO 100–800 for high quality.
- Lens: Peleng 8mm f/3.5 — circular fisheye (180° FOV), fully manual focus and aperture; best sharpness around f/8; expect some CA and flare in backlight.
- Estimated shots & overlap:
– 3 around at 120° + zenith + nadir (fastest, works for most scenes).
– 4 around at 90° + zenith + nadir (safer in complex interiors).
Aim for ~25–30% overlap on the circular edge. - Difficulty: Easy to Intermediate (easy shot count, moderate head calibration).
Planning & On-Site Preparation
Evaluate Shooting Environment
Check light direction and contrast. Fisheyes catch everything—sun, lamps, reflections—so plan your rotation to minimize strong light hitting the front element. In glass-heavy spaces (offices, atriums), watch for ghosting and reflections. If you must shoot against glass, get the front element as close as safely possible (a few centimeters) and shoot perpendicular to reduce reflections; use a black cloth flag off-camera to block stray light.
Match Gear to Scene Goals
The 5D Mark IV’s dynamic range and robust RAW files make it ideal for HDR panoramas—windowed interiors, sunset cityscapes, or night scenes with bright signage. The Peleng 8mm fisheye keeps your shot count low, which is great outdoors in changing light and in crowds. Indoors, manual focus and locked exposure eliminate frame-to-frame shifts that cause stitching seams. With this combo, safe ISO is 100–400 for critical detail and 800–1600 for low light; expose to protect highlights and plan to lift shadows in post.
Pre-shoot Checklist
- Charge batteries, clear cards, and clean lens/sensor. Dust is very visible on fisheye frames.
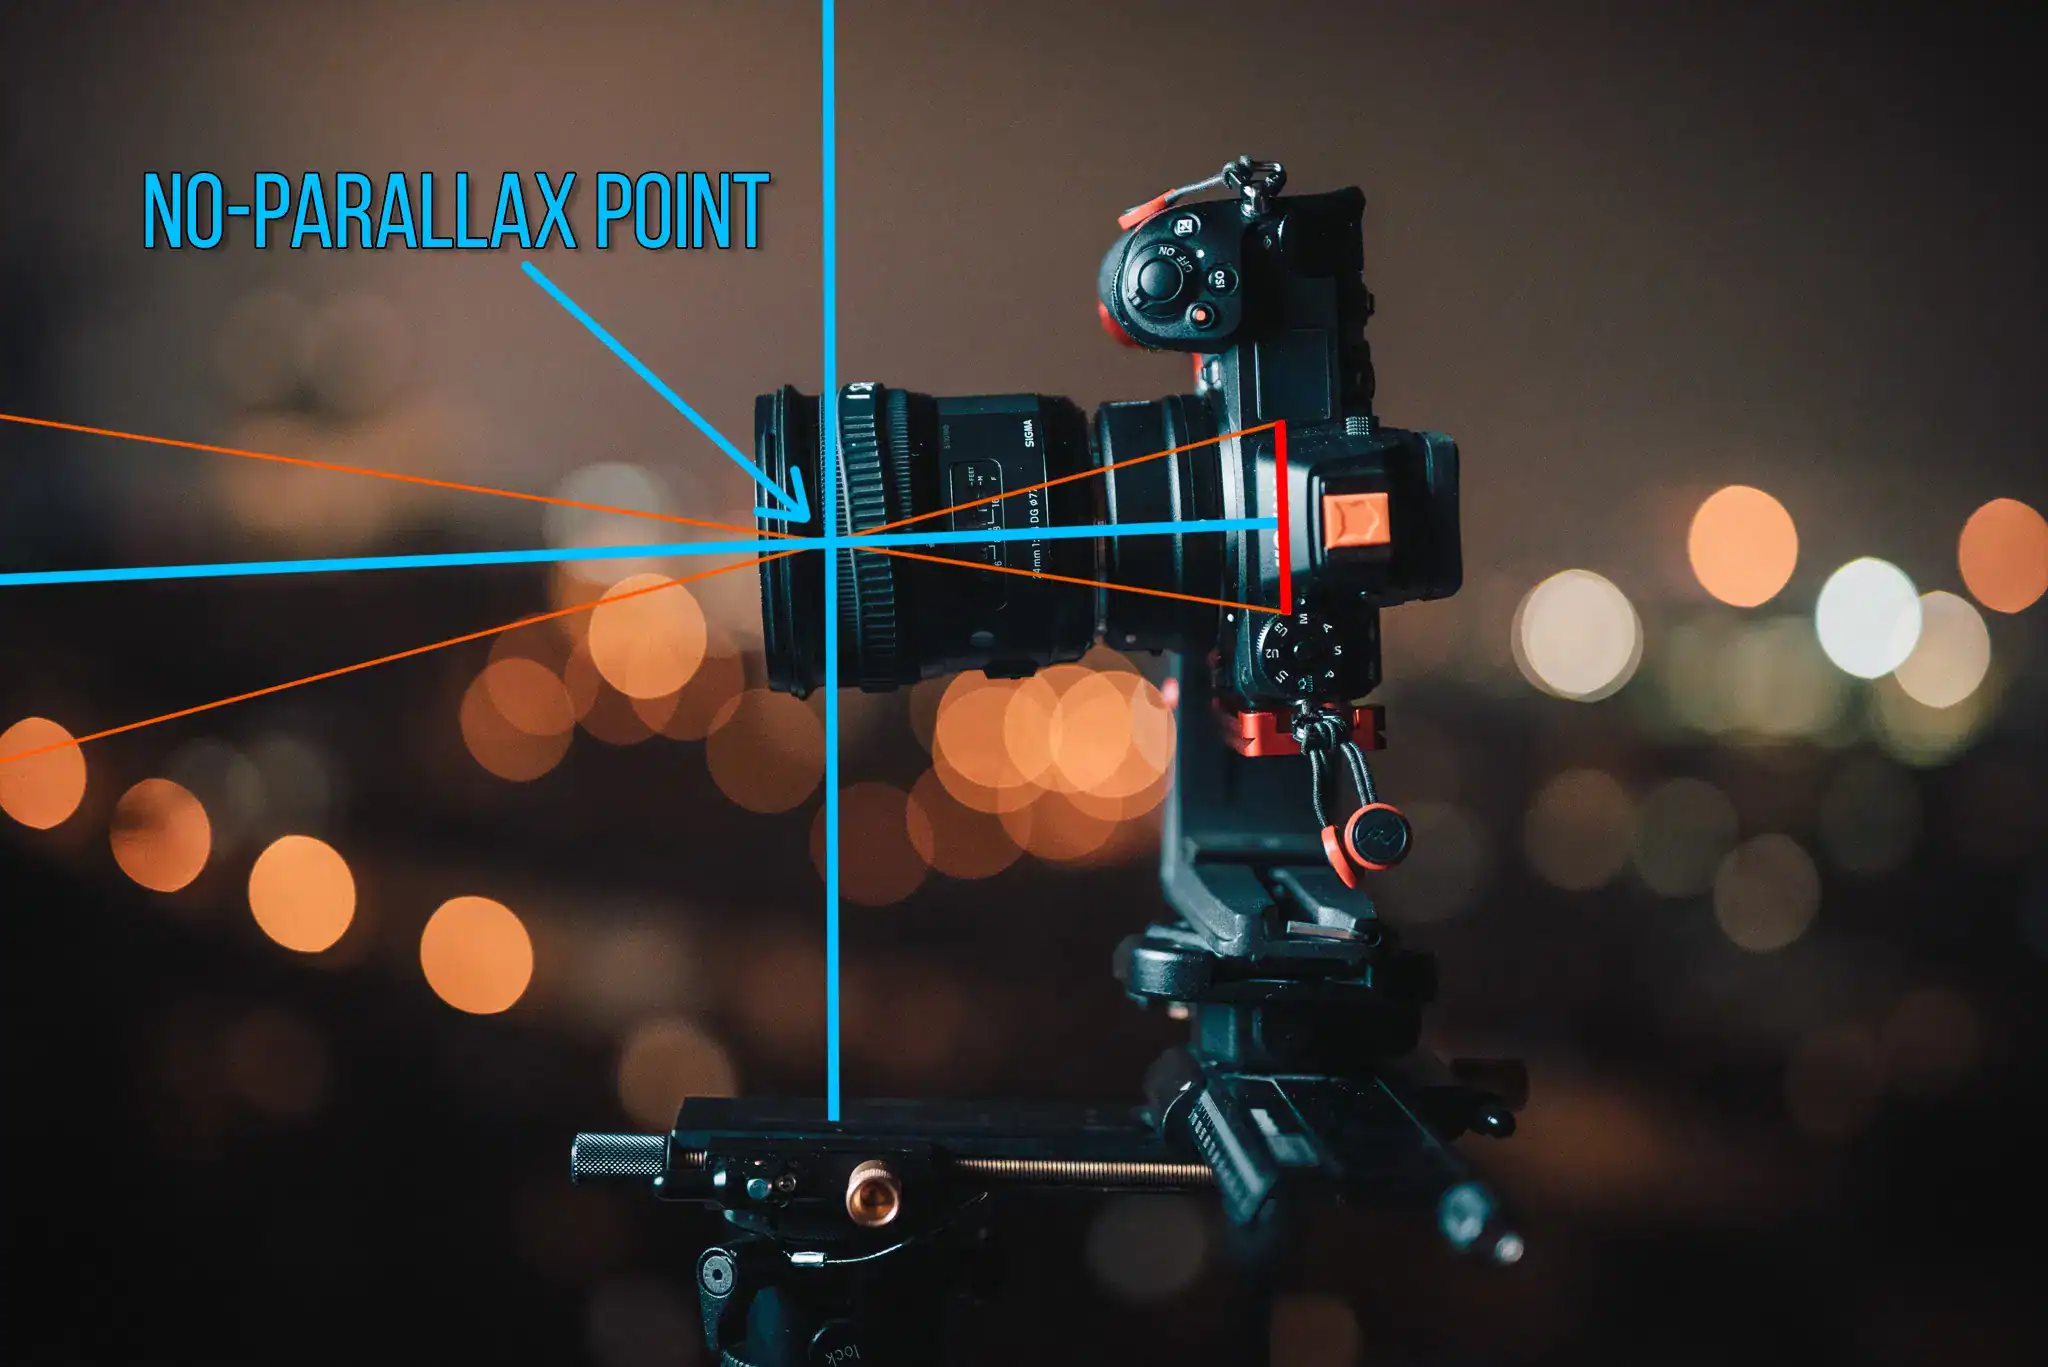
- Level tripod; verify panoramic head is calibrated for the lens’s entrance pupil (no‑parallax point).
- Safety checks: secure straps on rooftops, use tethers with poles, and avoid shooting under high winds with elevated rigs.
- Backup workflow: if time allows, do a second full rotation as a safety set; it rescues you from accidental bumps or people walking through.
Essential Gear & Setup
Core Gear
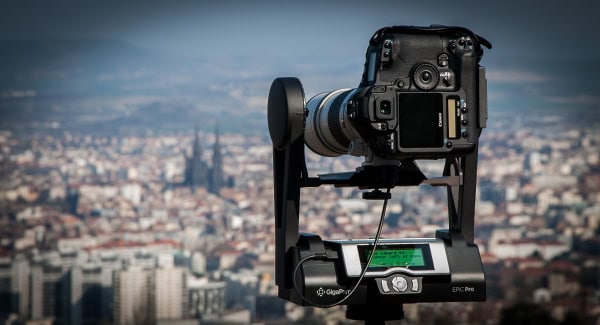
- Panoramic head: A multi-row or single-row head that allows fore-aft adjustment is critical. Aligning the entrance pupil over the rotation axis removes parallax—vital for clean stitches in close interiors.
- Stable tripod with leveling base: A leveling base speeds setup so your head’s yaw axis is truly vertical—key to a level horizon in the final pano.
- Remote trigger or Canon app (or 2-sec timer): Prevents micro-shake, especially at slower speeds or on poles.
Optional Add-ons
- Pole or car mount: Great for elevated views or moving platforms. Use guy lines when possible, add a safety tether, and keep exposures short to reduce vibration blur.
- Lighting aids: Small LED panels for dark corners in interiors; turn them off before the next sector if they’ll create uneven light in adjacent frames.
- Weather protection: A simple rain cover and microfiber cloth—fisheyes are prone to raindrops and flare.

Want a deeper primer on panoramic heads and alignment? This panoramic head tutorial breaks down the concepts clearly. Read: Panoramic head basics and techniques
Step-by-Step Shooting Guide
Standard Static Scenes
- Level and align: Level the tripod using the base; align the panoramic head so its yaw axis is vertical. Slide the 5D Mark IV on the rail until the lens’s entrance pupil sits precisely over the rotation axis. Confirm by rotating and watching a near object against a distant background—no relative shift means you’re good.
- Manual exposure and WB: Switch to M mode. Meter the brightest part you must retain (e.g., windows/sky), set aperture to f/8, shutter as needed, ISO 100–400 outdoors or 200–800 indoors. Lock white balance (Daylight or custom Kelvin) to prevent color banding between frames.
- Capture sequence: With the Peleng 8mm, shoot 3 around at 120° increments; if the scene has complex near foreground, do 4 around at 90° for more overlap. Keep overlap ~25–30% at the circular edge. Then shoot a zenith frame (tilt up) and a nadir frame (tilt down) for full coverage.
- Nadir/Tripod removal: For the nadir, either lean the tripod and shoot the patch area or capture a handheld nadir from the same nodal position. Mark a floor reference to keep positioning consistent.
HDR / High Dynamic Range Interiors
- Bracket ±2 EV (3 or 5 frames) to balance bright windows and dark corners. The 5D Mark IV’s bracketing and AEB features make this easy—just ensure M mode is set and ISO fixed.
- Lock WB to a fixed Kelvin or custom preset. Mix of daylight and tungsten? Try 4500–5000K and fine-tune in post.
- Use the self-timer/remote. The Peleng’s huge coverage amplifies any vibration, so keep it stable over the full bracket sequence.
Low-Light / Night Scenes
- Open to f/4–5.6 when needed; start around ISO 400–800 and lengthen shutter to 1/15–1/2 sec depending on wind and platform stability.
- Use mirror lock-up and 2-sec timer (or live view) to reduce shutter slap. Even better, a remote trigger and EFCS (if using live view) help minimize blur.
- Consider extra overlap: Night scenes with point lights can stitch more reliably with 4 around instead of 3 around.
Crowded Events
- Two passes: First pass for composition, second pass timing shots to capture gaps in the crowd at each sector.
- Mask in post: In PTGui/Hugin, use masks to keep the clean pass where people are least overlapping. Short shutter speeds (1/200 s+) help freeze motion.
Special Setups (Pole / Car / Elevated)
- Secure everything: Use a robust pole mount; add a lanyard tether to the camera. On vehicles, avoid highway speeds and shoot at stops.
- Short exposures: Increase ISO to keep shutter short (1/125–1/500 s) to fight vibration. Accept minor noise; you’ll clean it later.
- Slow, deliberate rotation: Rotate the rig smoothly, pausing to let oscillations settle before each frame.

Recommended Settings & Pro Tips
Exposure & Focus
| Scenario | Aperture | Shutter | ISO | Notes |
|---|---|---|---|---|
| Daylight outdoor | f/8–f/11 | 1/100–1/250 | 100–200 | Lock WB (Daylight 5200–5600K) |
| Low light/night | f/4–f/5.6 | 1/15–1/60 | 400–800 (up to 1600) | Tripod & remote; prioritize sharpness |
| Interior HDR | f/8 | Bracket ±2 EV (3–5 frames) | 100–400 | Balance windows & lamps, lock WB |
| Action / crowds | f/5.6–f/8 | 1/200+ | 400–800 | Freeze motion, consider 4-around |
Critical Tips
- Manual focus at hyperfocal: With 8mm at f/8 on full frame, set focus near ~0.7 m. That yields near-to-infinity sharpness; confirm with magnified live view.
- Nodal point calibration: Slide the camera along the rail until a near reference and a far background remain aligned while panning. Mark the rail position with tape for quick repeats with the 5D4 + Peleng.
- Lock white balance: Mixed lighting is common. Use a custom Kelvin or a gray card to keep color consistent across frames.
- Shoot RAW: The 5D4’s RAW files handle exposure blending and color adjustment far better than JPEGs.
- Stabilization: The 5D Mark IV has no IBIS, and the Peleng has no IS. Always use a stable tripod; turn off any stabilization on other lenses when mounted on a tripod.

Stitching & Post-Processing
Software Workflow
Import your RAWs into Lightroom or Capture One to apply consistent WB and basic noise reduction. Then stitch with PTGui (fast, robust for fisheyes), Hugin (excellent and free), or Photoshop (capable but slower for spherical 360s). For circular fisheye input, set lens type to Circular Fisheye, focal length 8mm, and FOV 180°. Add masks to clean seams, optimize control points, and output an equirectangular 2:1 panorama. As a rule of thumb, 25–30% overlap suits fisheyes; rectilinear lenses typically need 20–25% overlap but many more frames. For a thorough PTGui overview, see this review. Why PTGui is a top choice for panoramic stitching
Expected Resolution
Because the Peleng 8mm forms a circle inside your 5D4’s 4480‑pixel frame height, the effective per-frame diameter is roughly 4480 px. With 3–4 around plus zenith/nadir, expect final equirectangular widths in the ~8K–10K range after overlap and blending, suitable for high-quality web VR and virtual tours. For more on spherical resolution math, consult this technical guide. Spherical resolution for DSLR panoramas
Cleanup & Enhancement
- Nadir patch: Export a nadir frame and use PTGui’s Viewpoint Correction or clone/heal in Photoshop. AI content-aware fill works well on uniform floors.
- Color and noise: Match tones across brackets first; then apply global NR sparingly. Fisheye edges magnify noise and CA—correct CA before aggressive sharpening.
- Level and straighten: Use the stitcher’s horizon/line tools to align pitch and roll; correct verticals if presenting as a rectilinear crop.
- Export: Save a master 16‑bit TIFF and a web‑ready 8‑bit JPEG (e.g., 8,192×4,096) for VR platforms. Oculus’s DSLR 360 guidelines are a solid reference. Using a DSLR to shoot and stitch a 360 photo
Note: Stitching tools evolve quickly—always check your software’s latest documentation for the most accurate steps.
Useful Tools & Resources
Software
- PTGui panorama stitching (fast, fisheye‑friendly)
- Hugin (open source, powerful control for advanced users)
- Lightroom / Photoshop for RAW prep and retouch
- AI tripod removal/patching tools to speed nadir cleanup
Hardware
- Panoramic heads (Nodal Ninja, Leofoto) with fore‑aft adjustment
- Carbon fiber tripod with a leveling base
- Wireless remotes / intervalometers
- Pole extensions / car mounts with safety tethers
Disclaimer: brand names are provided for research; verify details with official sites.
Common Mistakes & How to Avoid Them
- Parallax error → Calibrate and mark the entrance pupil position for the 5D4 + Peleng. Re-check after transport.
- Exposure flicker → Use manual mode and fixed white balance; avoid auto ISO or auto WB.
- Tripod in frame → Always shoot a clean nadir; patch later with masks or content-aware fill.
- Ghosting from movement → Shoot multiple passes and mask the cleanest subjects in post.
- Night noise → Favor longer shutter on a tripod instead of pushing ISO too high; denoise after stitching.
- Flare with fisheye → Shield the lens from direct light sources; plan the rotation to avoid the sun blasting the front element.
Real-World Case Studies
Indoor Real Estate (Mixed Light, Bright Windows)
Mount the 5D4 + Peleng on a leveled head in the center of the room. Set f/8, ISO 100–200, and bracket ±2 EV (5 frames) for each direction. Shoot 4 around at 90° for extra overlap where furniture is close. Lock WB to ~5000K. In PTGui, enable exposure fusion or pre-merge brackets to HDR, then stitch. Mask windows from mid or dark brackets to keep detail without halos.
Outdoor Sunset (High Contrast, Changing Light)
Time is tight. Use 3 around at 120° + zenith + nadir. Spot-meter the brightest sky and set exposure to hold color (ETTR but protect highlights), ISO 100–200, f/8. Rotate efficiently; if the sun is in frame, capture that sector first to lock the look before light shifts. In post, use gradient masks to smooth exposure transitions at seam lines.
Crowded Festival (Motion Management)
Go 4 around, 1/250 s at f/5.6, ISO 800 if needed. Do two passes: first for alignment, second to capture gaps where people briefly clear. In PTGui, mask overlapping people and pick the clean limbs/faces from the second pass. A little content-aware clone at the nadir keeps the floor pattern consistent.
Rooftop Pole Shot (Wind + Vibration)
Use a carbon pole with a safety tether. Keep shutter at 1/250–1/500 s, f/5.6–f/8, ISO as needed. Rotate slowly; wait for the pole to stop wobbling before firing each frame. Expect to do 4 around; the extra overlap helps overcome minor blur or misalignment. Always prioritize safety—don’t shoot in strong winds or near edges without proper precautions.
Behind-the-Scenes Visuals

Frequently Asked Questions
- Can I shoot handheld panoramas with the Canon EOS 5D Mark IV?
Yes, but expect more stitching errors, especially indoors with near objects. Keep the camera at one pivot point, shoot 4 around quickly, and maintain 30% overlap. A tripod with a panoramic head is strongly recommended for professional results.
- Is the Peleng 8mm f/3.5 wide enough for a single-row 360?
Absolutely. It’s a circular fisheye on full frame, so 3 around at 120° plus zenith and nadir usually completes a full 360×180. For complex interiors or moving crowds, use 4 around for extra margin.
- Do I need HDR for interiors with bright windows?
Often yes. The 5D Mark IV has solid dynamic range, but bracketing ±2 EV (3–5 frames) ensures clean window detail without noisy shadows. Merge HDR first or let PTGui handle exposure fusion, then stitch.
- How do I avoid parallax issues with this setup?
Calibrate the entrance pupil on your panoramic head: align a near and far object, rotate, and adjust the rail until there’s no relative shift. Mark the rail position for the 5D4 + Peleng and reuse it.
- What ISO range is safe on the 5D Mark IV in low light?
ISO 100–400 is optimal for maximum detail; ISO 800–1600 is still very usable with light noise reduction. Prefer slower shutter on a stable tripod over pushing ISO beyond 1600 unless motion forces it.
Further Learning
For an end-to-end DSLR 360 workflow, including head setup and best practices, this guide is excellent. Set up a panoramic head for high‑end 360 photos