
5 Jan 2023
Set Default View
https://www.youtube.com/watch?v=YUlL_LAr--E You need to access Editor to set default view: 1. Create a new project or select your existed project. 2. Name your project. 3. Click "Let's go". 4. Click "+Scene". 5. Upload your image(s). 6. Select/Deselect your image(s). 7.
You need to access Editor to set default view:
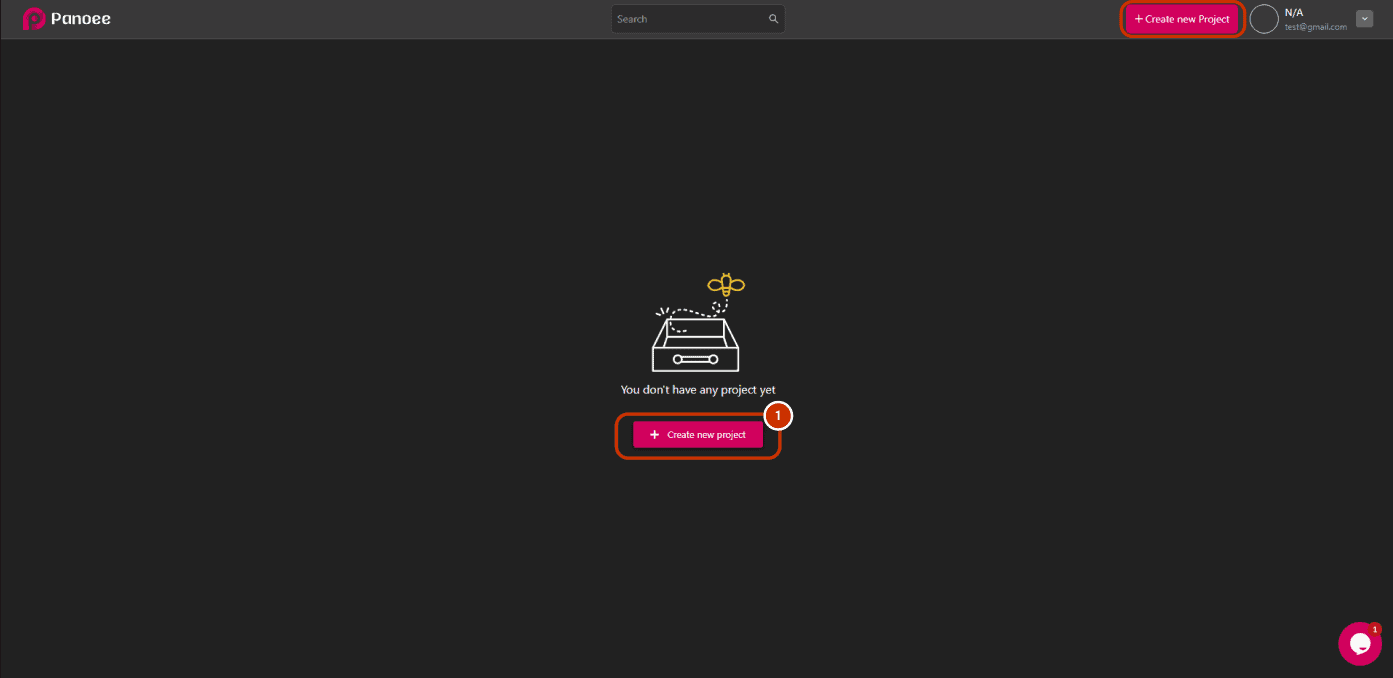
1. Create a new project or select your existed project.
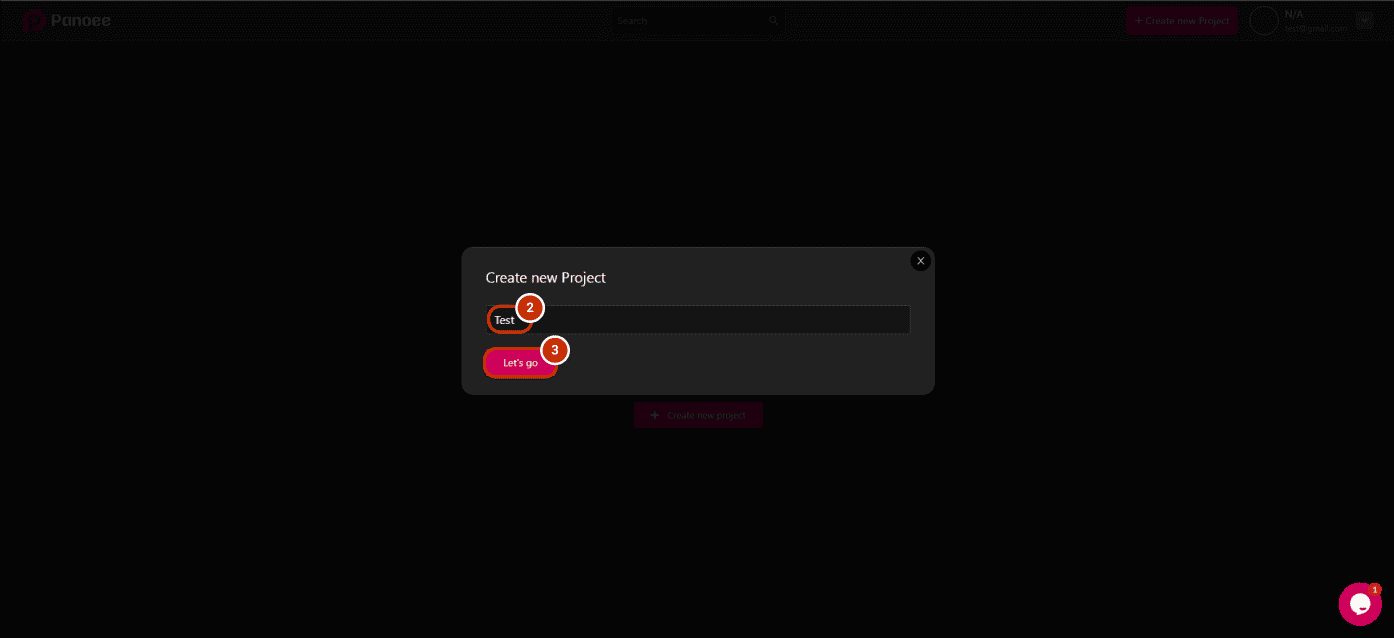
2. Name your project.
3. Click “Let’s go”.
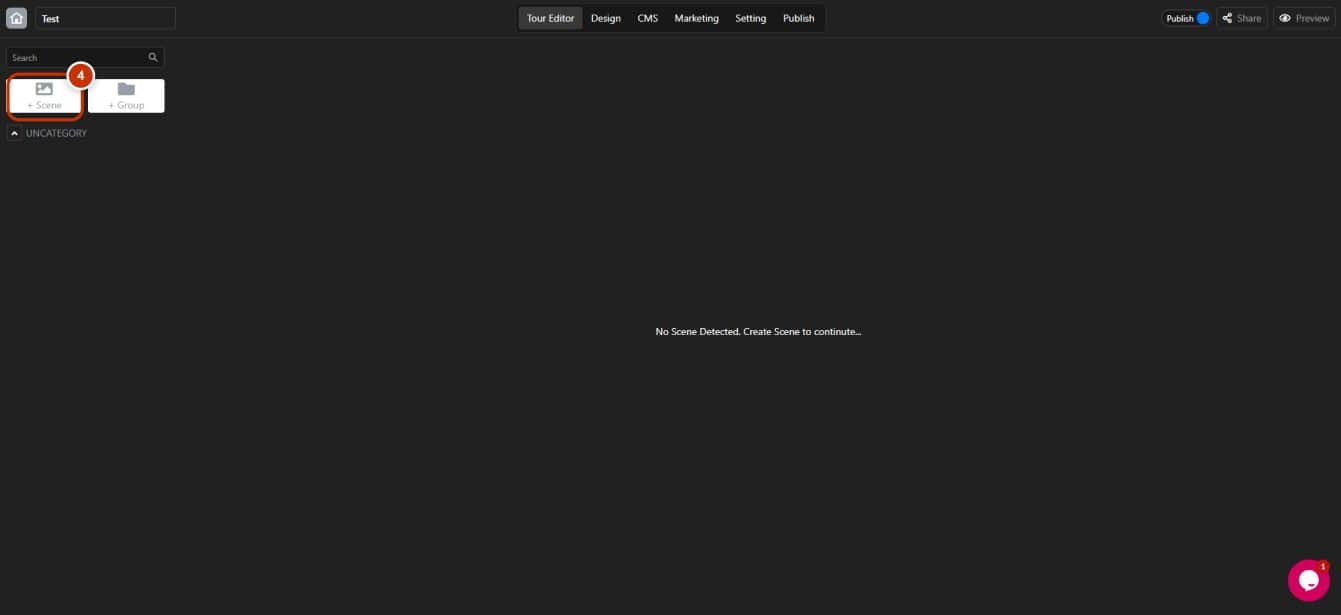
4. Click “+Scene”.
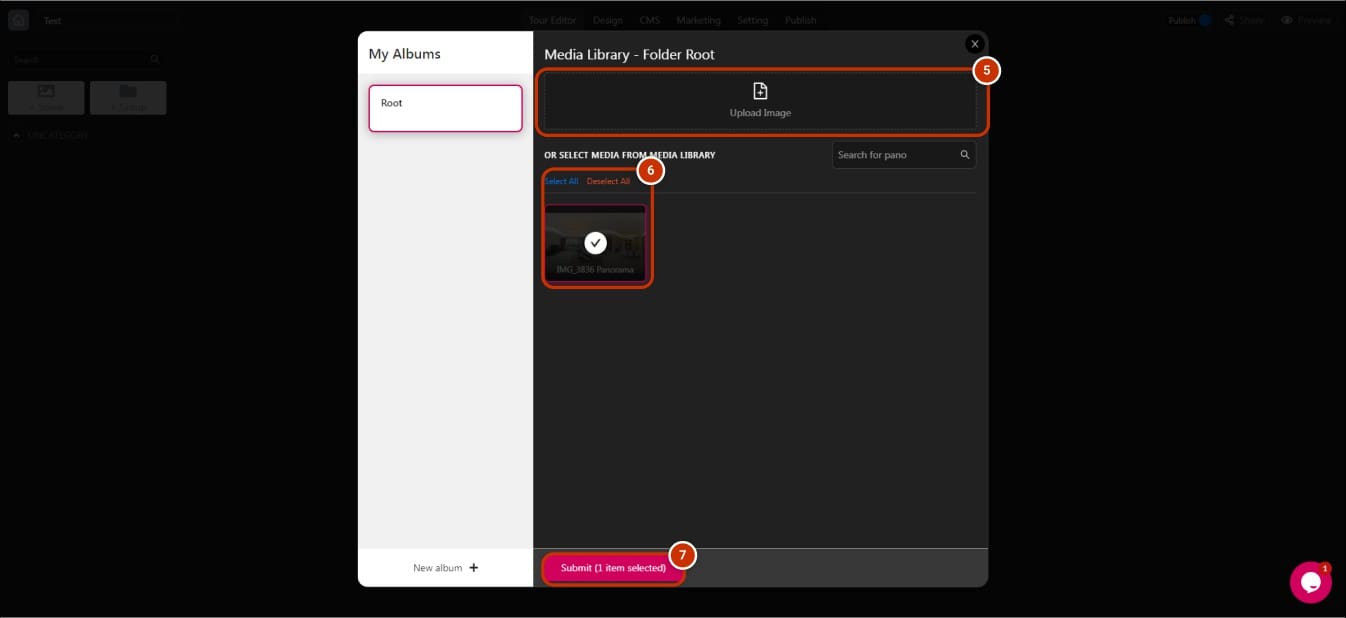
5. Upload your image(s).
6. Select/Deselect your image(s).
7. Click “Submit”.
In Editor Panel, there are two ways to set your initial view:
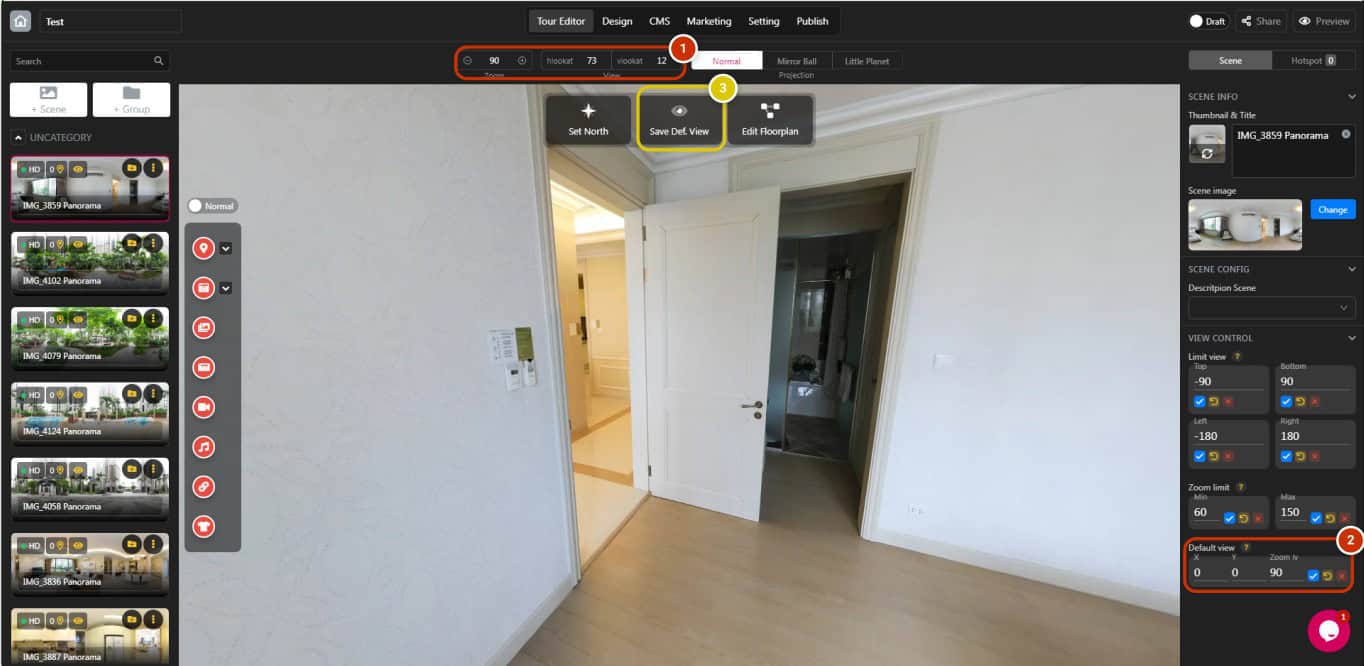
OPTION 1:
1. Check your ideal Zoom, hlookat (X) and vlookat (Y).
2. Copy and paste it to X, Y, and Zoom lv to set the default view.
OPTION 2:
3. Choose the view that you want to set and click “Save Def. View”
